Showing posts with label Snacks. Show all posts

Tuesday, December 14, 2010

Red Velvet Cupcakes

Red Velvet Cupcakes, it is Santa's new favorite, so i better make some and make Santa happy so that he will bring me what i wished for. My grandson, Alexander has been asking me - what i want for Christmas and i told him that i have only 1 thing i wanted - I wanted him to be 'kwai-kwai' and he said that there is no 'kwai-kwai' at the store and went away grumbling about Popo being crazy.


The recipe is HERE

Friday, December 10, 2010

Chiffon Sweet Potato Tartlets

What could be more enticing than a tart or a pie with smooth sweet potatoes filling. The color and texture is so appealing and so light, it is pure indulgence. Sweet potatoes/yams are in abundance this time of the year and to keep up with the Holiday Spirit, add Holiday Spices to the tarts/pies and kick up a notch.

The recipe is HERE

Friday, November 12, 2010

Pandan Flavored Ban Jian Kuih


According to Wikipedia - a QUEST is a journey towards a goal and my QUEST is to make the perfect ban jian kuih and the GOAL is that it should be chewy and honey-combed.


Many attempts and i am still 'in search of"???.

For recipe continue to read HERE


Monday, October 25, 2010

Gluten-Free Cheese Puffs


These just might be the best cheese puffs ever made and you would not believe me, if i tell you that they are the easiest to make.

.


The texture was crisp on the outside but soft and chewy in the inside, yes, chewy, a lot like Japanese mochi.with lots of good cheddar flavor. The cheese made these puffs quite tasty and addictive, so many tasters especially the kids, kept coming back for additional handfuls and they were all gone before there was time to cool and that was good cos it tasted better slightly warm..


The recipe can be found HERE

Friday, October 22, 2010

Rice wine Residue Sweet Soup


Bittersweet October. The mellow, messy, leaf-kicking, perfect pause between the opposing miseries of summer and winter. ~Carol Bishop Hipps

Looking out and this is what i can see - my backyard.


Yes, it is 'Bittersweet October" , today and the week to come is promised chill in the air as the changing of the leaves start to fall, in fact they have started to fall awhile back. Nothing takes away the chill or tastes better than a bowl of warm soup.

Continue for recipe HERE

Thursday, September 9, 2010

Kuih Gading Galoh

My sisters have always told me that i take too much upon myself in whatever i do, and they are absolutely right.  And, do i learn???? No!  Same old me, repeating my habits and trying to do too much.  Like last saturday, i had a potluck to go to and not satisfied with just bringing one kind of kuih, decided to make another one at the eleventh hour.  See, what happened to the most delicious kuih made, it was shabbly cut cos it was not cold enough and there was not enough time to do a good job.  I hate myself for that but do you think i will make kuih in a hurry again, you guessed right, i will.


Ingredients:

Rice Layer:

1 1/2 cup glutinous rice - washed and soaked
100 ml thick coconut cream
Thin coconut milk - enough to cover the rice
1 tsp  kosher salt
2 pieces pandan leaves
1 tsp dried bunga telang - reconstitute with 1 tbsp hot water and a drop of vinegar

Topping:

3 large eggs
300 ml thick coconut milk
1/4 tsp salt
2 tbsp tapioca starch
1/2 cup unbleached all-purpose flour
3/4 cup sugar

Method:

Put soaked glutinous rice into the rice cooker and enough thin coconut milk to just covering the rice.  Add salt and pandan leaves.

Press the cook function and as soon as the rice is cooked,  discard the pandan leaves and pour in the thick coconut cream.  Close the lid and leave on warm for 10 minutes for the coconut cream to marry into the rice.

In the meantime, mix the ingredients in a microwave-safe bowl and microwave on high for 1 minute and stir.  Continue to cook for another 1 more minute.  The mixture should still be runny.

Remove rice from the rice  cooker and put it in a greased 9 inch cake pan and pressed the rice down.  Sprinkle the coloring from the bunga telang on to the top of rice.  If you like a marbled look, then you would have to stir in the color to the rice and then press down.

Put the rice to steam for 5 minutes, then pour in half of the topping.  Steam the topping until cooked, then using a fork, roughen the surface with a fork before pouring in the rest of the topping.  Steam on medium heat until cooked and done.  Do not use high heat - patience will rewarded with a smooth topping.

When done, leave kuih to cool before cutting.


Serves

Saturday, July 31, 2010

Ginger Snack


Ginger needs no introduction to Asians, it can be condsidered as one of 'The Ancient Chinese Secret' for it's Medicinal Properties.  To those who do not cook or use as much Ginger and would like to know more about it, this is worth reading The Epicentre - Ginger

I grew up with these type of dried, cured snacks and ginger is still my favorite.   

In my younger years, these snacks will be sold only at the corner stall but now, there is a whole shop selling all sorts of which the choice is endless,  some of them are not even recognizable as to what fruit or vegetable they are made from but they all tasted so good.  I don't know why we as kids could not come up with nicer names for these snacks but always associated them with something unpleasant.  I am sure many will know - Yeong mare see or Ngau see thoi which is in cantonese and for those who don't understand cantonese, you won't want to know.
Ginger snacks come in different tastes, there is a sweet or a salty type and both of these types will be colored red,  They will be in bits or chunks and slices are normally soaked in vinegared syrup, like the ones served with Sushi.  This Ginger snack which i made is from very thin slices and it is easy, so give this recipe a try.


Ingredients:
 
Fresh ginger preferably younger ones - they are less spicy
1 cup plus 1/2 cup sugar
More sugar for coating
 
Method:
 
Scrape the skin off the ginger knobs and slice thinly using the mandoline.
 
Cook sugar and water until sugar dissolves.
 
Add in the ginger slices and cook for a minute or two.  The longer you cook the ginger slices, the less spicy they will be.
 
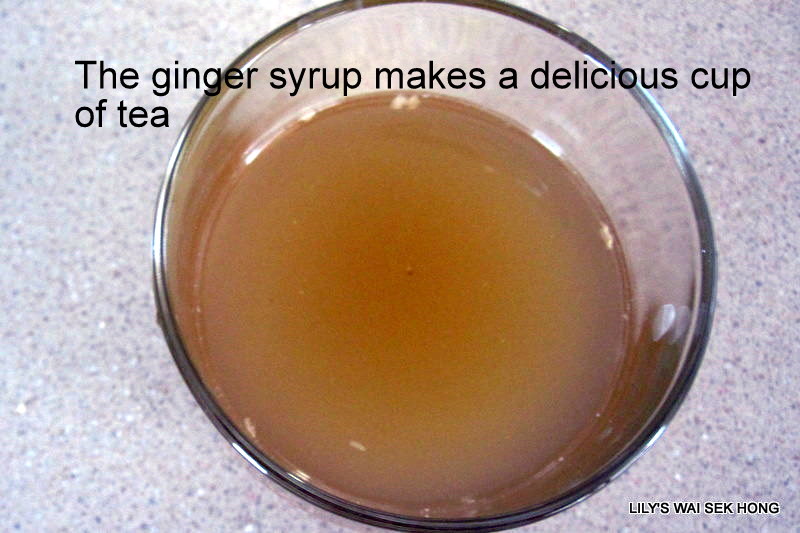
Remove ginger slices from the syrup and drain. The syrup can be diluted with iced/warm water to make a delicious drink or added to your cup of tea.
 
Coat the ginger slices in sugar and lay them in single layer on a cake rack and put to dry in the sun.
 
When dried, ginger slices are ready to be enjoyed.
 
Store in air-tight container.


Serves

Friday, June 25, 2010

Sweet Potato Ku


These are before steaming


These are after steaming

I cannot be any happier that these 'ku' turned out exceptional beautiful.  The color was so  natural and sweet, of course it was - no food coloring added - the culprit was orange sweet potato/yam.  The filling is the usual mung bean - oh oh i have a story to relate about this filling, yes this particular bag of mung bean filling.  It was a leftover from one of our cooking sessions(a group of us ladies gather every sunday and we cook and bake). So, one sunday, I was the first to arrive at Nellie's and Nellie went through her freezer and pulled out this bag, she asked if i wanted to eat durian.  Of course i said yes, and we had to defrost it fast before the other ladies turn up, there won't be enough to go around. the durian looked so good, yellowish and looked seedless too.  So, into the microwave it went for defrosting.  After a minute of two, the bag came out of the microwave, Nellie and I laughed until tears came down and me with my incontinense, had to rush to the rest room - It was not durian but a bag of mung bean filling.  The moral of the story was, we were bad hearted, we did not want to share and we got none too. I have learned my lesson and am sharing the mung bean filling with those who turned up for dinner last weekend. Hope they liked these cute bite-size 'ku'.


Ingredients:

For the dough:

150 gm orange sweet potato/yam - mash immediately after steaming and keep it hot.
150 gm glutinious flour
50 ml thick coconut milk
50 ml hot boiling water
1/4 tsp salt
2 tbsp cooking oil

Filling:

Follow the recipe from Angkoo Ah Mah Chew


Method:

Mix the glutinous rice flour, salt and coconut milk to the hot mashed sweet potato.  Knead until dough does not stick to your hands - slightly on the wet side, it will dry out after resting.  If the dough is soft and pliable, do not add in the water.   Lastly add in oil and knead lightly till dough is shiny. Rest dough for at least 1 hr.

Scale the filling and dough according to the size of the mould.  Flatten it and wrap in a filling.  Seal and shape into a round/  Dust the mould with a little glutinious rice flour.  Press firmly into the mould  Knock and dislodge from mould.  Place on oiled banana leaf.  Continue process with the rest of the dough pieces.

Use tap water and wash off excess glutinious rice flour from the surface.  Do it quickly and lightly before steaming the 'ku' over LOW heat for 5 - 10 minutes. Remove the steamer lid after 5 minutes to lower the heat as the pattern will not be as sharp if the heat is too high.  Remove from steamer and brush with oil for a  shiny surface.


 Serves

Friday, June 18, 2010

Spam Musubi

In Hawaii, Spam musubi, a tradition of Japanese onigiri,  is a very popular snack   Spam musubi is composed of a block of rice, be it jasmine or sushi rice,  with a slice of grilled spam(luncheon meat can be used, then the snack will be called Luncheon Musubi) on top and nori (seaweed) wrapping to hold it together. There are no fast rules to making this yummy snack except for the 3 main ingredients, cooked rice, Spam and Nori.  The sauce is of your own choice and if you are like me, i like mine naked - meaning 'no sauce' cos i find that the Spam is flavorful enough, in fact too salty.  A musubi mould would be good to have but until i visit Hawaii to get one, i will have to continue to make my musubi with a homemade improvised mould - an empty small can of Spam with both ends removed and a thick cardboard cut to the size of the can, covered with several layers of aluminium foil to be used as a press. A word of caution, the edges of the bottom of spam can is very sharp, so neaten sharp edges and use with caution.   I love making spam musubi for breakfast cos it is fast to make.  You know - asian household -  i always have leftover cooked rice and i will just heat it up in the microwave.  I even use the microwave to brown my slices of Spam - no washing of pans.  Yes, in a jiffy you can assemble and a sumptous breakfast/snack can be served.


Ingredients:

5 cups cooked sushi rice/jasmine rice, room temperature
5 sheets nori, cut in half lengthwise
1 (12 oz.) can Spam
Furikake(optional), to taste

Sauce:
6 tbsp soy sauce
4 tbsp mirin
4 tbsp sugar


Method:Cut Spam into 10 slices. Fry until slightly crispy. Remove and drain on plate lined with paper towels.

To make the sauce, in another pan, combine soy sauce, mirin and sugar. Bring to a boil over medium-high heat, then reduce to low. Add Spam slices, coating them in the mixture. When mixture has thickened, remove Spam from pan.

To assemble, lay a sheet of nori lengthwise on a clean surface. Moisten lower half of musubi mould and place on lower third of nori. Fill musubi mould with rice and press rics flat until the rice is 3/4-inch high(this height is desirable but it does not matter, if you have put in more rice, then the height will be taller -  no rocket science). Sprinkle rice with furikake if using. Top with slice of Spam. Remove musubi mould with the press still on top of Spam,  keep in a bowl of warm water to keep it clean and moist.


Starting at the end towards you, remove the press and  fold nori over Spam and rice stack, and keep rolling until completely wrapped in the nori. Slightly dampen the end of the nori to seal it.

Repeat with the other nine Spam slices, making sure to rinse off musubi maker after each use to prevent it from getting too sticky.

Wednesday, June 2, 2010

Macha/Green Tea Chiffon Cake


I remembered there was a request for Green Tea Chiffon but have not responded until now as i finally got some green tea meant for baking.  This time the cake is green unlike the green tea kasutera which was slightly brown.  This recipe makes a smaller chiffon cake and if you prefer a taller cake, use a 12 cup chiffon cake tube mould and double the recipe.  The green tea is not overpowering, it is just there to tease your palate.  The tablespoon of honey added made the cake moist. 


Ingredients:A:

1 cup sifted cake flour (sift the cake flour, then measure a cup, otherwise use the scale - 100 gm)
3/4 tsp baking powder
1/8 tsp salt
4 egg yolks
1 tbsp honey
2 1/4 tbsp fine granulated sugar
4 tbsp warm oil (microwave for 30 seconds)
1 tbsp green tea powder (Matcha powder)
1/3 cup hot water (or hot milk)


6 egg whites
3 tbsp fine granulated sugar
1/2 tsp cream of tartar


Method:

Preheat oven to 350 f for convection, 325 f for convention and for friends at sea-level - 325 f. 

Dissolve green tea powder and honey in hot water (or hot milk).
Combine cake flour, baking powder and salt  and sieve for at least 3 times.

Whisk egg yolks, then stir in sugar and whisk until sugar dissolves. Add warm oil, green tea mixture, and sift in cake flour mixture. Combine and stir well.

Using an electric mixer, beat egg whites and cream of tartar in medium speed until foamy .  Add in the sugar and continue to whisk until thick and in a soft stiff peak.

Temper a 1/3 of egg whites into the batter and mix in well.

Gently incorporate the rest of the egg whites with a rubber spatula by folding in. . Don’t beat or stir too hard, just fold and combine well.

Transfer mixture to cake mould. Run a spatula or butter knife all over the batter to remove air pockets.

Bake on the lower rack in preheated oven for 35 to 40 minutes. Test for doneness.

Remove from oven and invert the mould immediately. Let the cake cool completely. (i like to use a metal funnel and let the tube rest on it)

When cake is cooled, use a knife to run around the edges of mould and take out the cake carefully.